1608 阅读 2020-03-13 15:30:15 上传
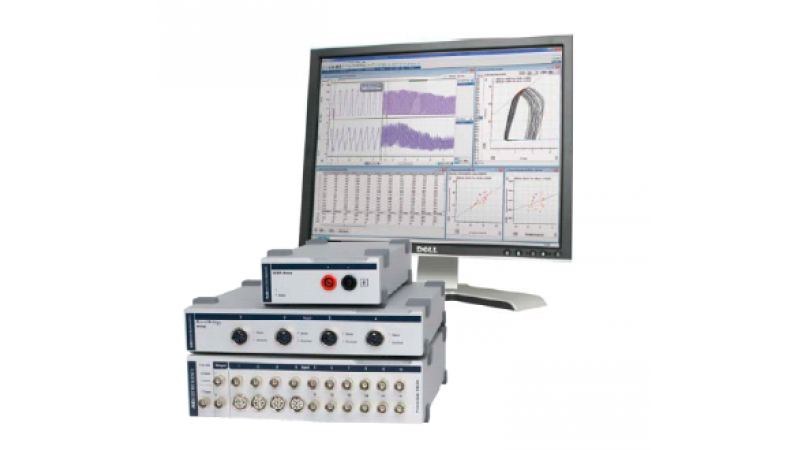
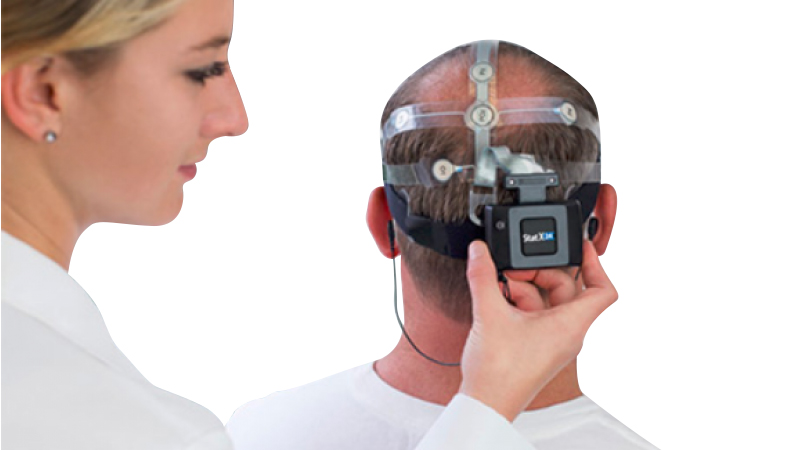
Take one.Hi everyone and welcome to another PowerLab skills video. Today keep you that I will be going over the Electromyography lab also known as EMG.For this lab,we're gonna need our PowerLab components that we always need we're gonna need our power lab box,our power cord for the box and then also our USB connector .so I'm gonna go ahead and connect those right now so we can continue to prefer the video.so one end of the USB connector goes into the box.while the other goes down into the computer on a USB slot on the front come on computer.power cord goes into the back of the box in this black panel and with this power switch next to it.and power cords are on each side of the table.if you have powered up the box you should see three lights on the front and since we don't that means we have to hit the switch next to the power cord. now that we have done that we can see that we have three lights on the front meaning the box has been turned on.also for this level we're gonna need several other components out of the box.we're gonna need our power lab lead connector,the actual leads to that the connectors to the leads themselves,and a strap.conductivity gel, the external stimulator,and you're also going to need six electrodes for this. so,to start with we're going to set up the leads and we're going to pull out our lead connector and these go into the bio amp on the front of the box.that is this big black connector here and that only goes in one way so if the adapter does not fit in nicely try another direction.so you want to make sure this cable is uncoiled to make sure to resist any possible interference or static in the cable,that we may receive during this experiment so try and lay it out so it doesn't boil over itself or anything like that.Next what we're gonna do is we're going to begin part one of this experiment which is going to be the use of the EMG to track the muscle activation of the bicep and tricep.Now in this lab we're only using these two muscles but this can be done with anymuscle group on the body and it can as long as you put the electrodes over the proper muscle we will get the proper readings.so first we're gonna do is we're gonna take out our leaves here,it's gonna be important that we connect all five of these today unlike in our previous labs and so and to help us out it's all color coordinated.so we're just going to go ahead and plug in all of these into the appropriate colored spots.similar to the by an amplifier there's only one way that these can be connected ,so if they do not fit try twisting them around and putting it in the other way.So now for this next part of the experiment we're going to connect we're gonna start up the EMG program. so to do that to find the settings file we're going to go down here into the bottom left corner of the screen to the windows tab. open that and in the search box we're going to type in EMG settings.This will bring up all of our files and the first three files are the ones we're going to be looking at for the first part of this lab we're going to look at the voluntary settings and then for the second part it's going to be the evoked.So I'm going to go ahead click on the voluntary settings ,this is gonna open up a dialog box,that says it cannot open, just hit OK,and our file to be here so let's maximize this screen so you can see what's going on.and so here if we see that channel 1 is the biceps and channel 2 is the triceps, so in that corresponds to the labeling on the EMG leads.so the next part this lab is we're going to hook up to our power lab box. to do this we're going to connect these EMG leads to the appropriate electrodes or the strap .so first we're gonna connect kick into an earth strap so he doesn't get electrocuted in any way .so to do this you're gonna open up the grey earth strap and on the inside there is a little adapter to.you're gonna connect the green lead to this.Then we're gonna put it on our subjects wrist that way on the arm that we are actually performing the experiment on fuzzy side in.I'm gonna use your right arm Keegan.put that on this wrist tight not tightly but snugly wrap it around, so that it has good contact with the skin to make sure our subject is safe during this experiment.so for the following two it does matter which leads we use which ones go with which. so as our indicator says the red and the brown are on their own channel so that's gonna have to go on one of muscles such as the bicep or the tricep together. and then for our other channel being white and black that will also have to go on the remaining muscle together, that you cannot go on opposite. tips for putting on the EMG electrodes it is more comfortable for your subject if you put the leads onto the electrodes first.that way you don't have to mash these into better skin or try and pinch them on.so what I'm going to do is go around on his right side,and I'm going to ask him to roll up his sleeves so I can gain access to these muscles easily and we don't have to fight around.so first I'm going to connect the butt hook up his bicep to the power lab system,to do this you want to find the middle part of their muscle belly,and to do this on people that have a little bit lower musculature status you want to ask them to flex slightly so that you can palpate that muscle and make sure you're in the middle so you we can get the best reading.so since Keegan's I can see Kagan's bicep I'm just going to place the one of the electrodes on the lower half of that muscle.and then I'm going to connect the other. I'm gonna place these the center of each of these connectors about three to five centimeters apart so that we can get the best signal.so now with that done we have this bicep all hooked up to the power line system.next we're going to connect his tricep in a very similar fashion as what we just did with the bicep,we're gonna connect the leads to the e/m the electrodes before applying them and then we're going to put them on the middle of his muscle belly of his tricep just as we did with the bicep.you can get the subjects but tricep to flex by asking them to perform elbow extension and this will flex that muscle if having a hard time just seeing it.and that will allow you to palpate it as you are trying to find it. and then that last one will go once again three to five centimeters from a centre to centre of the electrodes.so now we get back over to our power lab system on our computer.and we're gonna first check our signal strengths and see if we have to do in corrections on it,so that we can make sure we get the real suit,so first we're gonna go over here to our drop down menu for our biceps tab,and we're going to the bio ant selection we're gonna select that,and this is gonna bring up a little box that we can see what our signal looks like and since it is very small right now,we're gonna ask to perform elbow flexion and we're hopefully going to see a deflection in this tab as we are.so as you can see we have some signal that is going off of the screen some guys are suddenly relaxed at this point so that we can adjust this so that we can actually see the full thing,so to view now we're gonna go to our range tab,and since we're at 2 millivolts we're gonna bump it down to 1 and we're going to ask you once again to perform some elbow flexion to see if we have corrected our problem. so since we went the wrong way we see that most more signals gone off the screen.so we're actually going to set a decreasing the millivolts we're going to increase it to five. and then grasp Keegan once again to perform a low flexion,and now we can see that our signal only a maximum really only takes up 2/3 of the screen.so we were fine there,so we'll hit OK,and now our bicep tab is calibrated,so now we're going to do the same with the tricep to make sure that signal is readable as well.so we're gonna go here,to the tab drop down menu we're gonna hit by om we're gonna ask the subject to perform elbow extension. so that we can flex that tricep our signal.as you can see similar with the biceps it is a little big so we're going to decrease that so we can actually see the full signal on screen.So now we're back to just about two-thirds of the screen and that will be just about right for this experiment.so we're gonna hit okay, and then we're gonna hit start,and we're gonna ask you to perform an isometric contraction while holding the table and we will see that both of the triceps and the biceps will activate.so go ahead and perform an external extension for me.And then let's see,so as you can see where he was activating his tricep we had was a strong signal and while he's not device that has none but then when he activated his bicep he had a strong signal, and we're lacking a tricep.for that that wraps up the setup for this first part of the lab we will bring the second part in just a few minutes.welcome back to our power lab ,EMG lab, we're going to now go over the second part of this lab in which we have a new EMG signal.so to do this we're going to externally stimulate a person's publicus muscle.so that we can see a muscle twitch.For this lab it is the exact same setup as part one except what you will be doing is we will be disconnecting one of the two channels that we have because we're only going to need one muscle tracking this for this experiment.so just go ahead and unplug carefully these leads do not pull on the cable because they will just pull out from that doctor sure that you're pulling from the actual connections site. so that leaves us with our earth strap and one channel of the black and white leaves.so for this next experiment we're going to ask we're going to make sure the box is on and that our subject is ready so we're going to put on our earth strap first once again on our subjects left wrist this time. as we did making sure it's snug and has full contact with the subjects wrist at all times fuzzy side in.and then from here we're going to open up the EMG settings.so we're gonna go down here.once again into our windows menu down here in the search bar tab in EMG settings.so after we've done that we're gonna turn back to our subject and prep them for this experiment.so first things first is we're going to take our externalstimulator cable it is this cable in a box that has alternating red and black wires that are twisted around each other.we're going to leave these wires to twist it and as it is and we're going to plug these into the front side of the box. so on the front side of the box we're going to see in the middle here we're going to see a red and a black port.those correspond fancily with these exact adapters.so we're gonna put the red adaptor in the right spot and we're going to put the black connector in the black spot.so then to make sure that our subjects are safe they have equipped a separate power switch for this stimulator alone. so we're going to have to flip this from the off position to the on position so that we can make sure that stimulator will work when the time comes. so next we're going to set up how we're going to track EMG on our subjects with our muscle. we're going to take the same the electrodes we did last time except we're going to cut them down as I have here and as you can see due to the size of the area we're working with we must decrease the size of the electrodes. so just as we did in the first part we're going to connect the leads to the electrode before putting it on the subject that way we don't have to mash into the person's skin or pinch them. as we're trying to apply these so we're going to connect the white adapter here.and we're gonna put it out on the outside of that muscle as far as weight as we can from the center of the muscle belly. and then we're going to connect the black lead to the electrode at first.now this one we can't good not go necessarily three to five centimeters away but we will go as far as we can without the electrode or close as we can without the electrodes actually touching each other. so for me that's about right there. so we're going to put these on make give them with some good pressure because of the curvature of the wrist here.and once those are on we are complete. so to find the nerve that's going to stimulate we have to find the median nerve to find the median nerve typically it's in the center of one's risk,this can change just as we all become different on the outside we are different on the inside so we may have to shift a little laterally or medially depending on the person that you have,and this will change from subject to subject, so what we're gonna do for this experiment is we're gonna move our lead cables out of the way and we're gonna make room for this to go on to our subject. and we're going to carefully place these on his wrist,so that we can make sure we have stimulation. so we're gonna put that there for now and then we're gonna modify our lab settings because now our subject is all set up for this experiment. over here we're going to all right so tell alter the settings afford this stimulator it says we're go up here to be set up tab ,we're going to have that drop down and halfway down we're going to see this stimulator,selection option we're going to select that and it's going to bring up this window.some of the things we have to do in this window,we have to turn the outlet simulator on in this tab and also so depending on your subject we may have to alter the strength of this signal in microamps,and so that will be down here at the very bottom it has a range of 0 to 20.so we're going ahead and turn this up to about 10 to start with with our subject,and we're gonna go from there. so next what we're going to do is wear this stimulator will stimulate due to our settings when we hit the start button on the screen. so as we do this we're going to ask the subject to hold this down with their opposite hand firmly into their wrist so that we make sure that we're extending up good signal all the way through.so we're going to hit start and we're gonna see if we can get any signal from our subject. so as we saw we did have a small twitch in his thumb right there and so we are apparently on the median nerve,some ways that we can correct this if we are having problems is we can try shoot as I said earlier shifting this medially or laterally depending on the location of this nerve,we can also try twisting it diagonally,so we hit a larger area ,and if all those failing we cannot get a signal, we can finally go to trying a conduction gel, a conduction gel what we'll do is we'll just take a small dab of it ,put the cap back on,and we will apply it to these two small electric metal bits on the bottom side of this so we'll just put a little bit on there smear a little bit on there.and then we will reapply it to the subjects wrist this will make sure that the maximum signal is going through to our subject from there and it decreases the resistance from the skin.so you will continue to try this and so you get the proper alignment and it can be frustrating,so stick with it you will find it and if absolutely necessary ask your professor for some help.Thank you.


